
Named ranges can make formulas more readable and improve the overall organisation of your spreadsheet. In this blog, Paula Guilfoyle explains the benefits of named ranges and how to set them up.
Named ranges are labels that you can assign to individual cells or cell ranges. This allows you to use range names anywhere you would use a cell or cell range reference.
For example, you can define the cell range C1:C45 as "Employees." Now, whenever you need to enter that cell range, you don't have to remember the exact cell range. You just need to type the name that you used to define it.
In addition, range names use absolute cell references. This means if you copy a formula or use AutoFill when working with named ranges, the formula will maintain its original cell reference.
Named ranges are most useful when working with formulas as they make them much more readable and improve their overall organisation. In this image , cells A2 and B2 have each been given a name (Sales and Expenses, respectively).
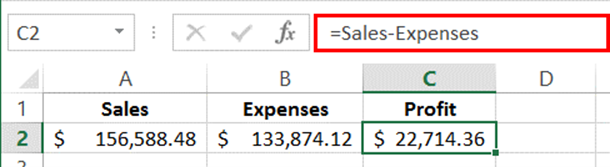
Rather than cell references being used in the formula, there are named ranges. To someone working on this workbook for the first time, this formula is much more self-explanatory than "=A2�B2" would be.
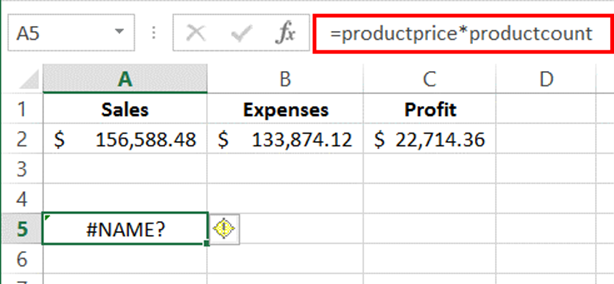
Perhaps what is most notable about named ranges is that they allow you to construct formulas before adding the data. When you are designing your worksheet, you can create formulas using names instead of traditional cell references, and then define the names for the corresponding ranges as data becomes available.
For example, in this image we have entered the formula into cell A5. As you can see, this formula:
(=productprice*productcount)
Results in a #NAME error. This error will remain visible until both named ranges in the formula have been defined.
For accountants, named ranges allow you to quickly navigate a workbook, read formulas with ease and create formulas with named ranges while waiting on data.
Setting up named ranges can be done very quickly with a few clicks of the mouse. Once set up they can be used in formula and used to navigate a workbook.
You first need to select the cell or range of cells that you would like to work with.
- To define a range name, you first need to select the cell or range of cells that you would like to work with. For this example, select cells A2-A4. Next, click Formulas, then Define Name (not the drop-down arrow).
- This action will open the New Name dialog box. Here, you can give the new range a name, select which part(s) of your workbook that this range will reference, and add comments.
- By default, if the cells are all in one row or column, the Name field will be filled in with that column or row�s header (if one has been defined).
- In this example, you can see that the Sales header has been inserted into the Name field. Leave the default settings unchanged and click OK to apply the new named range.
- You will now be returned to the worksheet you�ve been working with. Repeat the above steps to define "Expenses� as the named range for cells B2-B4.
- You will now see that the formula that was based upon named ranges has changed to incorporate the values you just defined.
Paula Guilfoyle is an author for accountingcpd. To see her courses, click here This blog is an extract from her new course, Advanced Excel Formulas for Accountants.
You need to sign in or register before you can add a contribution.